
How Multi-Chain Wallets Simplify Crypto Management
Manage crypto across blockchains from one wallet—back up your seed, verify network and gas, test small transfers, and use hardware for high-value funds.

One multi-chain wallet lets me view, send, and store crypto across several networks from one app - but I still have to check the right chain, address, and gas token every time. That’s the big idea.
If I use Bitcoin, Ethereum, Polygon, or Solana in different places, a multi-chain wallet cuts down on app switching and backup clutter. Instead of juggling several wallets, I can often use one recovery phrase, see my total portfolio in USD, and keep tabs on gas balances for each chain. But there’s a trade-off: if that recovery phrase is exposed, the risk can reach every chain tied to that wallet.
Here’s the article in plain English:
- What it is: one wallet interface for several blockchains
- How it works: one seed phrase can generate different addresses for different chains
- What changes day to day: I can track balances in one place instead of opening many apps
- What still does not change: each chain has its own fees, rules, and native gas token
- What setup matters most: back up the recovery phrase offline, enable only the chains I use, and test with a small transfer first
- What causes losses: wrong-network sends, bad app approvals, and low gas balances
- What lowers risk: hardware wallet use, small test transactions, weekly approval reviews, and slow transfer checks
One stat stands out: a 2025 study cited in the article tracked 681 accidental transfers and $5.5 million in losses. That’s why speed matters less than accuracy.
If I had to boil the whole piece down to one rule, it would be this: pause, confirm the network, then send.
How to set up a multi-chain wallet
Create the wallet and back up the recovery phrase
Install the wallet only from the official website or the official app store page. Before you download anything, check the publisher name and watch for clone apps or small spelling mistakes. That extra 10 seconds can save you a lot of pain.
During setup, create a strong password and turn on a PIN or biometric lock, such as Face ID or fingerprint unlock.
You’ll also get a 12–24-word recovery phrase. Write it down on paper, check each word twice, and keep it somewhere secure, like a home safe or a bank safe deposit box. Do not save it as a screenshot, in a cloud note, or in your email drafts. That one recovery phrase can restore all supported chains in that wallet.
After the wallet is locked down, add only the chains you plan to use.
Add supported chains and check network details
Most wallets open on Ethereum mainnet by default. If you want to use other networks, go to Networks or Manage Blockchains in settings and turn on the ones you need. Common picks include Polygon, BNB Smart Chain, and Arbitrum.
If your wallet supports it, use Chainlist to fill in EVM network details. It helps cut down on manual mistakes.
Before you send or receive anything, check these three details for each network:
- Chain name: for example, BNB Smart Chain, not just “BSC”
- Chain ID: Ethereum mainnet is 1, and BNB Smart Chain is 56
- Native gas token: ETH on Ethereum, BNB on BNB Smart Chain, and MATIC on Polygon
A wrong chain ID can send you to the wrong network. It also helps to keep only the chains you use turned on, so the wallet stays cleaner and it’s harder to make transfer mistakes.
Buy crypto and send it to the correct wallet address
Once your chains are enabled, buy a small amount first and send it on the matching network. If you want to buy crypto with U.S. dollars, you can use Kryptonim, a secure, EU-regulated fiat-to-crypto platform.
Before you confirm any transfer, make sure three things match:
- the asset, such as ETH or USDC
- the blockchain network, such as Ethereum mainnet or Polygon
- the destination address from the correct network view
Copy the address, paste it, then compare the first and last 4–6 characters. Don’t skip that check. Before sending a larger amount, test with about $5. Then confirm the test transfer on the matching block explorer.
sbb-itb-0796ce6
How to manage crypto on multiple chains day to day
Once you buy crypto and your wallet is funded, day-to-day management comes down to three simple habits: track balances, check every transfer, and keep risky activity separate.
Track balances and total portfolio value in one place
Use your wallet’s single portfolio view to check balances across all enabled chains in one spot. It’s the easiest way to see what you hold without bouncing between networks.
Switch between All assets and network filters to see where each token sits. Turn on automatic token detection so new assets show up without manual entry. If a balance looks off, pause before doing anything and compare it with a market price feed.
Send and receive funds without mixing up chains
This is where small mistakes can get expensive fast. Wrong-network transfers are costly: one 2025 study tracked 681 accidental transfers and $5.5 million in losses.
Before you confirm any transfer, double-check:
- the selected network
- the recipient address
- the memo or destination tag
- the fee
If a fee suddenly looks high, that’s often a sign something’s off and needs another look. Also, keep a small gas balance on every chain you use. One chain’s native token can’t cover fees on another, so it helps to top up gas during your regular portfolio check.
Connect to apps and keep wallet activity separated
The same care applies when you connect your wallet to apps. Open dApps from a typed URL or a bookmark, not from a social post or DM. That extra step may feel slow, but it can save you a lot of grief.
Before approving anything, read the permission request carefully. Skip unlimited approvals unless there’s a clear reason to use them. After you’re done with a dApp, revoke old approvals with your wallet’s built-in tools or a trusted approval checker.
It also helps to split wallet activity across labeled accounts, such as:
- Long-Term Holdings
- DeFi & NFTs
- Testing
That setup makes it easier to keep your main funds away from higher-risk activity.
Benefits and risks of using one wallet for many chains
Once a wallet connects to several networks, the big question is simple: is the convenience worth the trade-offs?
Where multi-chain wallets save time and cut friction
Using one wallet for many chains means you’re not bouncing between separate wallets for each network. That cuts app switching and makes portfolio checks much faster.
It also helps because different chains work best for different jobs. With one wallet, you can use each chain for what it does best without changing tools every time. It’s a lot like carrying one key ring instead of stuffing your pockets with loose keys.
- All assets visible in one portfolio view
- One seed phrase to back up instead of many
- Faster access to multiple supported networks from a single interface
Still, there’s a catch: one mistake can affect every chain in the wallet.
The main risks and how to reduce them
One recovery phrase now protects every chain in the wallet, so a leak has a much bigger blast radius. And if you send funds on the wrong network, you may not get them back. That’s why it’s smart to check the network and address before every transfer.
| Risk | How it shows up | How to reduce it |
|---|---|---|
| Single seed phrase exposure | One compromise can expose assets across all chains | Store the phrase offline; connect a hardware wallet for higher-value holdings |
| Sending on the wrong network | Funds sent to an incompatible address may be unrecoverable | Verify the network before confirming |
For higher-value holdings, connect a hardware wallet. It keeps your seed phrase off any internet-connected device, which cuts out the most common attack path.
A simple weekly workflow for managing crypto across chains
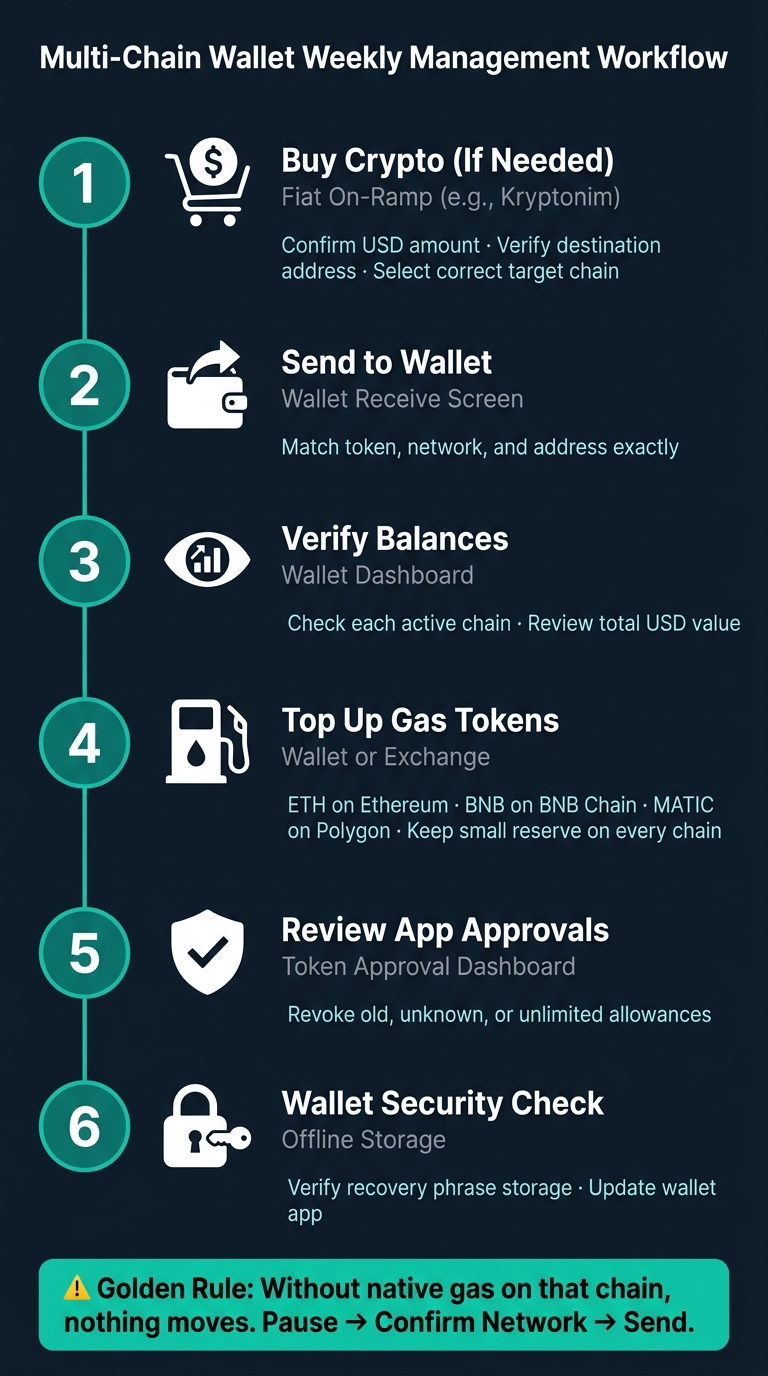
Multi-Chain Wallet Weekly Management Workflow
Steps for funding, tracking, and security reviews
Use this weekly check to keep balances, gas, and approvals under control across every chain. It helps you catch gas shortages, stale approvals, and wrong-network mistakes before they stop a transaction.
Stick to the same routine each week so nothing slips through the cracks.
| Task | Location | Key checks |
|---|---|---|
| Buy crypto if needed | Fiat on-ramp (e.g., Kryptonim) | Confirm the U.S. dollar amount, destination address, and target chain before purchase. |
| Send to wallet | Wallet receive screen | Match the token, network, and address exactly. |
| Verify balances | Wallet dashboard | Check each active chain and total USD value. |
| Top up network gas token | Wallet or exchange | Keep a small reserve of network gas on each chain, such as ETH on Ethereum or BNB on BNB Chain. |
| Review app approvals | Token approval dashboard | Revoke old or unknown allowances. |
| Wallet security check | Offline storage | Verify recovery phrase storage and update the app. |
One rule matters more than almost anything else here: without native gas on that chain, nothing moves. No send, no swap, no approval. Keep a small reserve on every network you use so you don't get stuck at the worst time.
Approvals need attention too. Token approvals don't expire on their own, which means an old app can still keep access long after you've stopped using it. A quick weekly review can help you spot old, unknown, or unlimited allowances and revoke them before they turn into a problem.
And when it's time to move funds, slow down for a second. Pause, confirm the network, then send.
FAQs
Can one wallet address work on every chain?
No. One wallet address does not work on every blockchain.
A lot of EVM-compatible networks, such as Ethereum, Polygon, and Avalanche, use the same address format. But that doesn't mean those addresses work on non-EVM networks like Solana or Bitcoin.
That distinction matters. Before you send anything, check that your wallet supports the network you're using and that the destination address matches that network. Blockchain transactions can't be reversed, so a small mistake can turn into a permanent loss.
What happens if I send crypto on the wrong network?
Sending cryptocurrency on the wrong network can lead to permanent loss of funds. Once a blockchain transaction goes through, you usually can't undo it. And if the asset lands on an address or network that doesn't support it, getting it back is often not possible.
For example, sending Ethereum-based assets to a Solana address can cause a loss. The same goes for mixing up versions of BNB chains. A simple check can save you a lot of pain: make sure your wallet’s active network matches the destination network before you send anything.
It also helps to send a small test transaction first. That extra step may feel slow, but it's a lot better than losing the full amount.
Do I need gas tokens on every blockchain I use?
Yes. Every blockchain uses its own native gas token to cover transaction fees, like ETH on Ethereum, MATIC on Polygon, and SOL on Solana.
That detail matters more than many people expect. If you send assets to a new chain but don’t also have that chain’s gas token, your funds can end up effectively stuck. You may be able to see them in your wallet, but you won’t be able to send, swap, or use them until you add a small amount of the native token for fees.
A smart rule of thumb: keep a small reserve of the native token on every chain you use.