
How to Buy Polygon (POL) with a Card
Step-by-step guide to buying Polygon (POL) with a card: wallet setup, ID checks, fees, limits, and security.
You can buy POL with a Visa or Mastercard in just a few steps: enter the amount in USD, paste your Polygon wallet address, finish ID checks, and confirm the card payment. In many cases, the token arrives in minutes, while Polygon transfers often settle in about 2 seconds and network fees are often below $0.01.
Here’s the short version:
- I need a Visa or Mastercard that supports 3D Secure
- I need a Polygon-compatible wallet set to the Polygon network
- I should have my government ID ready for verification
- I need to check the exchange rate, platform fee, and any bank charges
- I should expect some card purchases to fail if the bank blocks crypto or the billing details do not match
- I need to store my recovery phrase offline and review the wallet address before paying
A few numbers stand out. The article says Kryptonim charges 4% per transaction, minimum buys can range from $1 to $50, and verified users may get limits up to $20,000 per day. It also notes that POL replaced MATIC in September 2024.
If I want the process to go smoothly, I should prepare my wallet, ID, and card first, then double-check every detail before I submit the order.
What You Need Before Buying POL
Card, Device, and Identity Requirements
Before you buy POL, have a few basics ready.
You’ll need a Visa or Mastercard debit or credit card, along with a phone or computer that has a stable internet connection. The card should be in your legal name, and it needs to support 3D Secure (3DS) verification. If you’re not sure whether 3DS is turned on, check with your bank before you start.
You should also be ready for identity verification. Most platforms ask for your legal name, date of birth, and street address, plus a government-issued photo ID like a driver’s license or passport. Some may also ask for a selfie, and some won’t allow card purchases until you complete a higher verification tier.
With your card and ID in place, the next thing you need is a wallet that works with Polygon.
How to Set Up a Polygon-Compatible Wallet
You’ll need a wallet that supports the Polygon network so you can receive POL. Before you copy your wallet address, make sure the wallet is set to Polygon and not Ethereum Mainnet.
To get your receiving address, open the wallet, choose POL, and tap Receive. Then copy the address and double-check the first four and last four characters. It’s a small step, but it can save you from sending funds to the wrong place.
If you’re setting up a new self-custody wallet, write down your seed phrase on paper and keep it offline.
Using Kryptonim for Card Purchases
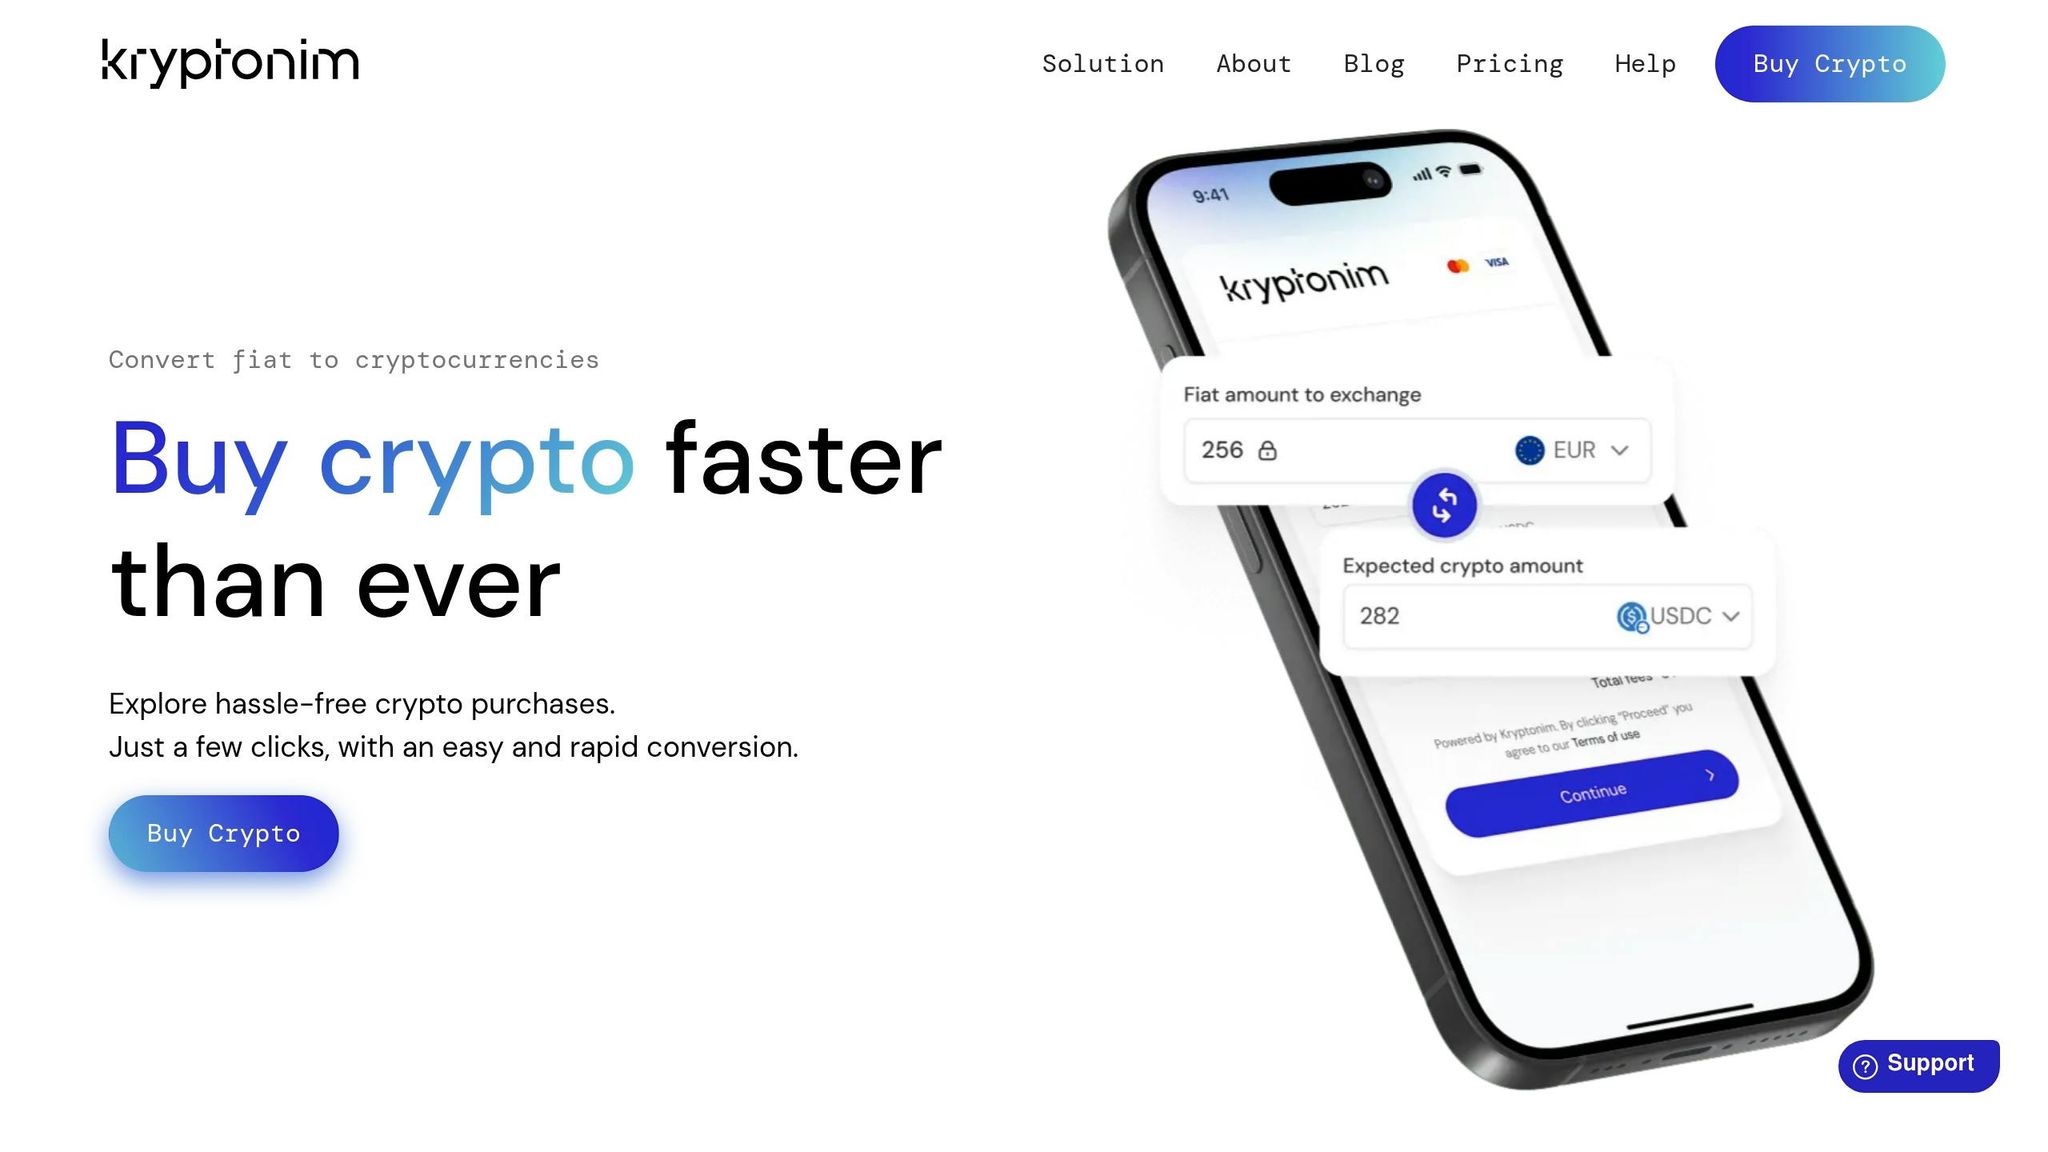
Once your wallet address is ready, you can move on to the card purchase. Enter the amount you want to buy, add your Polygon wallet address, complete the verification step, and pay with your card. Before you confirm the payment, check the fee and the exchange rate.
If you’re buying from the U.S., look into regional availability and any state-level restrictions before you begin.
sbb-itb-0796ce6
How to Buy Polygon (POL) with a Debit or Credit Card
How to Buy POL with a Card: Step-by-Step Guide
Kryptonim's checkout has three parts: order, verification, and payment.
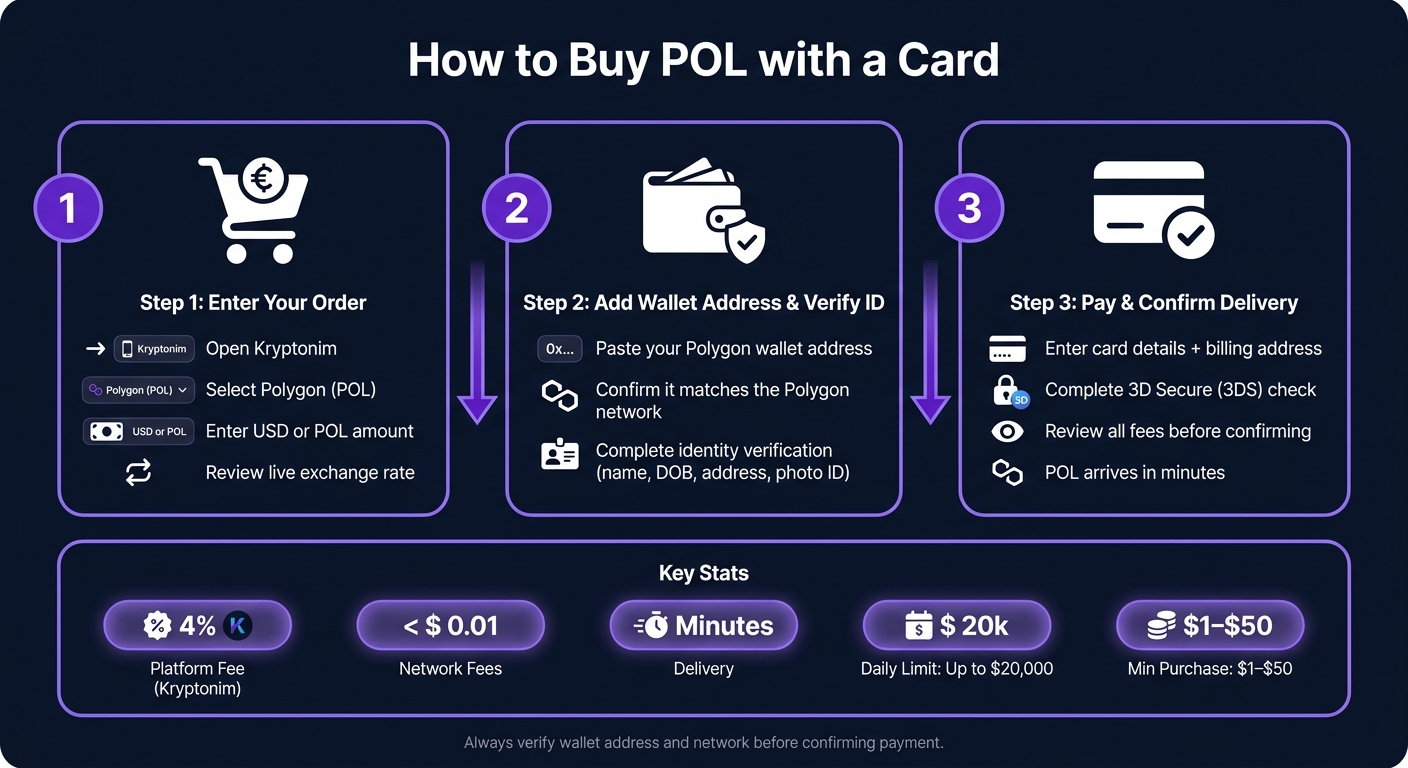
Step 1: Choose a Purchase Interface and Enter Your Order
With your wallet and ID ready, start the buy flow in Kryptonim. Open Kryptonim and select Polygon (POL). Enter either a USD amount or a POL amount, then look over the live quote. Before you move on, make sure POL is selected and double-check the exchange rate.
Step 2: Add Your Wallet Address and Complete Verification
When Kryptonim asks for it, paste your Polygon wallet address into the wallet address field. Check the entire address carefully and make sure it matches the Polygon network your wallet supports.
You may also need to complete identity verification.
Once that's done, you'll move to the card payment step.
Step 3: Pay by Card and Confirm POL Delivery
Enter your card details and billing address. If your bank asks for a 3D Secure check or sends a one-time passcode, complete that step before you continue.
On the final review screen, go over the exchange rate, service fee, card fee, and network fee. Polygon network fees are usually less than $0.01, so the main cost often comes from the service and card fees. After payment is confirmed, POL is sent straight to your wallet address. Most transactions finish within minutes. Save the reference ID shown on the confirmation screen.
Fees, Limits, and Failed Payments
Before you hit confirm, take a minute to check the fees, your buying limits, and the most common reasons card orders get rejected. That small pause can save you a headache.
Fees U.S. Buyers Should Expect
A card purchase usually comes with three costs: a platform fee, a spread, and any fees from your card issuer. For U.S. buyers, Kryptonim charges 4% per transaction.
In most cases, the biggest part of the cost comes from the platform fee and whatever your card issuer adds on top. If you pay with a credit card, your bank may code the purchase as a cash advance. That can trigger extra charges or interest from the issuer.
Minimums, Daily Caps, and Monthly Limits
Minimum purchase amounts usually fall between $1 and $50, depending on the provider. Verified accounts can often buy up to $20,000 per day.
Your actual limit usually comes down to how much identity verification you've finished. So if you're planning a larger buy, check your account limits first instead of finding out at checkout.
Why Card Purchases Fail and How to Fix Them
If checkout gets stuck, start here.
| Issue | Likely Cause | How to Fix It |
|---|---|---|
| Card declined | Bank blocks crypto or international charges | Contact your bank to authorize the transaction, or try a different card |
| 3D Secure failed | 3DS not enabled | Use a 3DS-enabled Visa or Mastercard and make sure you can receive the one-time password |
| Verification mismatch | Name on card doesn't match account name | Use a card issued in your legal name as registered on the platform |
| Billing address error | Address entered doesn't match bank records | Enter the billing address exactly as it appears on your bank statement |
| Price moved before checkout finished | Quote expired during checkout | Refresh the page to get a new quote and complete payment quickly |
| Delayed delivery | Network congestion or security review | Check the transaction hash on a block explorer; contact support if POL still has not arrived after 30 minutes |
Fix the issue, then try the payment again.
How to Keep Your POL Purchase Secure
Once POL lands in your wallet, the job isn't done. You still need to protect the account and check every transfer with care.
Protect Your Wallet, Account, and Recovery Phrase
Start with the basics: use a strong, one-of-a-kind password for your account. If your wallet or exchange offers two-factor authentication (2FA), turn it on. And when you install a wallet, get it only from the official website or the official app store listing.
Your recovery phrase matters more than almost anything else here. It is the only way to restore access to your wallet. Keep it offline in a secure physical location. That means not in a notes app, not in an email draft, and not in a screenshot.
If someone asks for your recovery phrase or private key, do not give it to them. A real support agent should never ask for either one.
Next up: check every transaction before you approve it.
Check Every Transaction Before You Send Money
Before you confirm any transfer, verify the address, network, and amount. Match the destination wallet address in the purchase form with the one shown in your wallet app. Then check that the total cost in USD and the exact amount of POL you expect to receive are correct.
Also make sure the receiving network matches the one you picked at checkout. If you send funds on the wrong network, you may need to use a bridge and pay extra gas fees.
When you're sending POL to a new personal wallet for the first time, it's smart to send a small test amount first. That gives you a chance to confirm everything arrives as expected before you move a larger sum.
Keep a record of the transaction details, including:
- receipt
- date
- time
- USD total
- POL amount
- exchange rate
- destination address
- network
FAQs
Do I need a POL wallet before buying?
No. You do not need a POL wallet before buying Polygon (POL).
You can buy POL and send it straight to a wallet address you provide during the transaction. So, there’s no need to set up a POL-specific wallet ahead of time.
Can I buy POL with a credit card in the U.S.?
Yes. In the U.S., you can buy POL with a credit or debit card on several reputable platforms that support Polygon (POL), which is also referred to as MATIC.
Most platforms accept Visa and Mastercard and show their fees clearly. That said, access can still depend on where you live, so it’s smart to confirm U.S. support before you buy.
What should I do if my card payment fails?
First, make sure your card details are correct, your card can be used for online transactions, and you have enough funds available. It also helps to check for any blocks on online or international purchases and confirm that you finished any required identity verification or 3D Secure steps.
If the payment still doesn’t go through, contact the platform’s support and ask whether your bank or card issuer has placed any limits on the card. You can also try a different supported card or another payment method.